
XJZ flotation machine
XJZ flotation machine There are thousands of old‑type XJ flotation machines in…
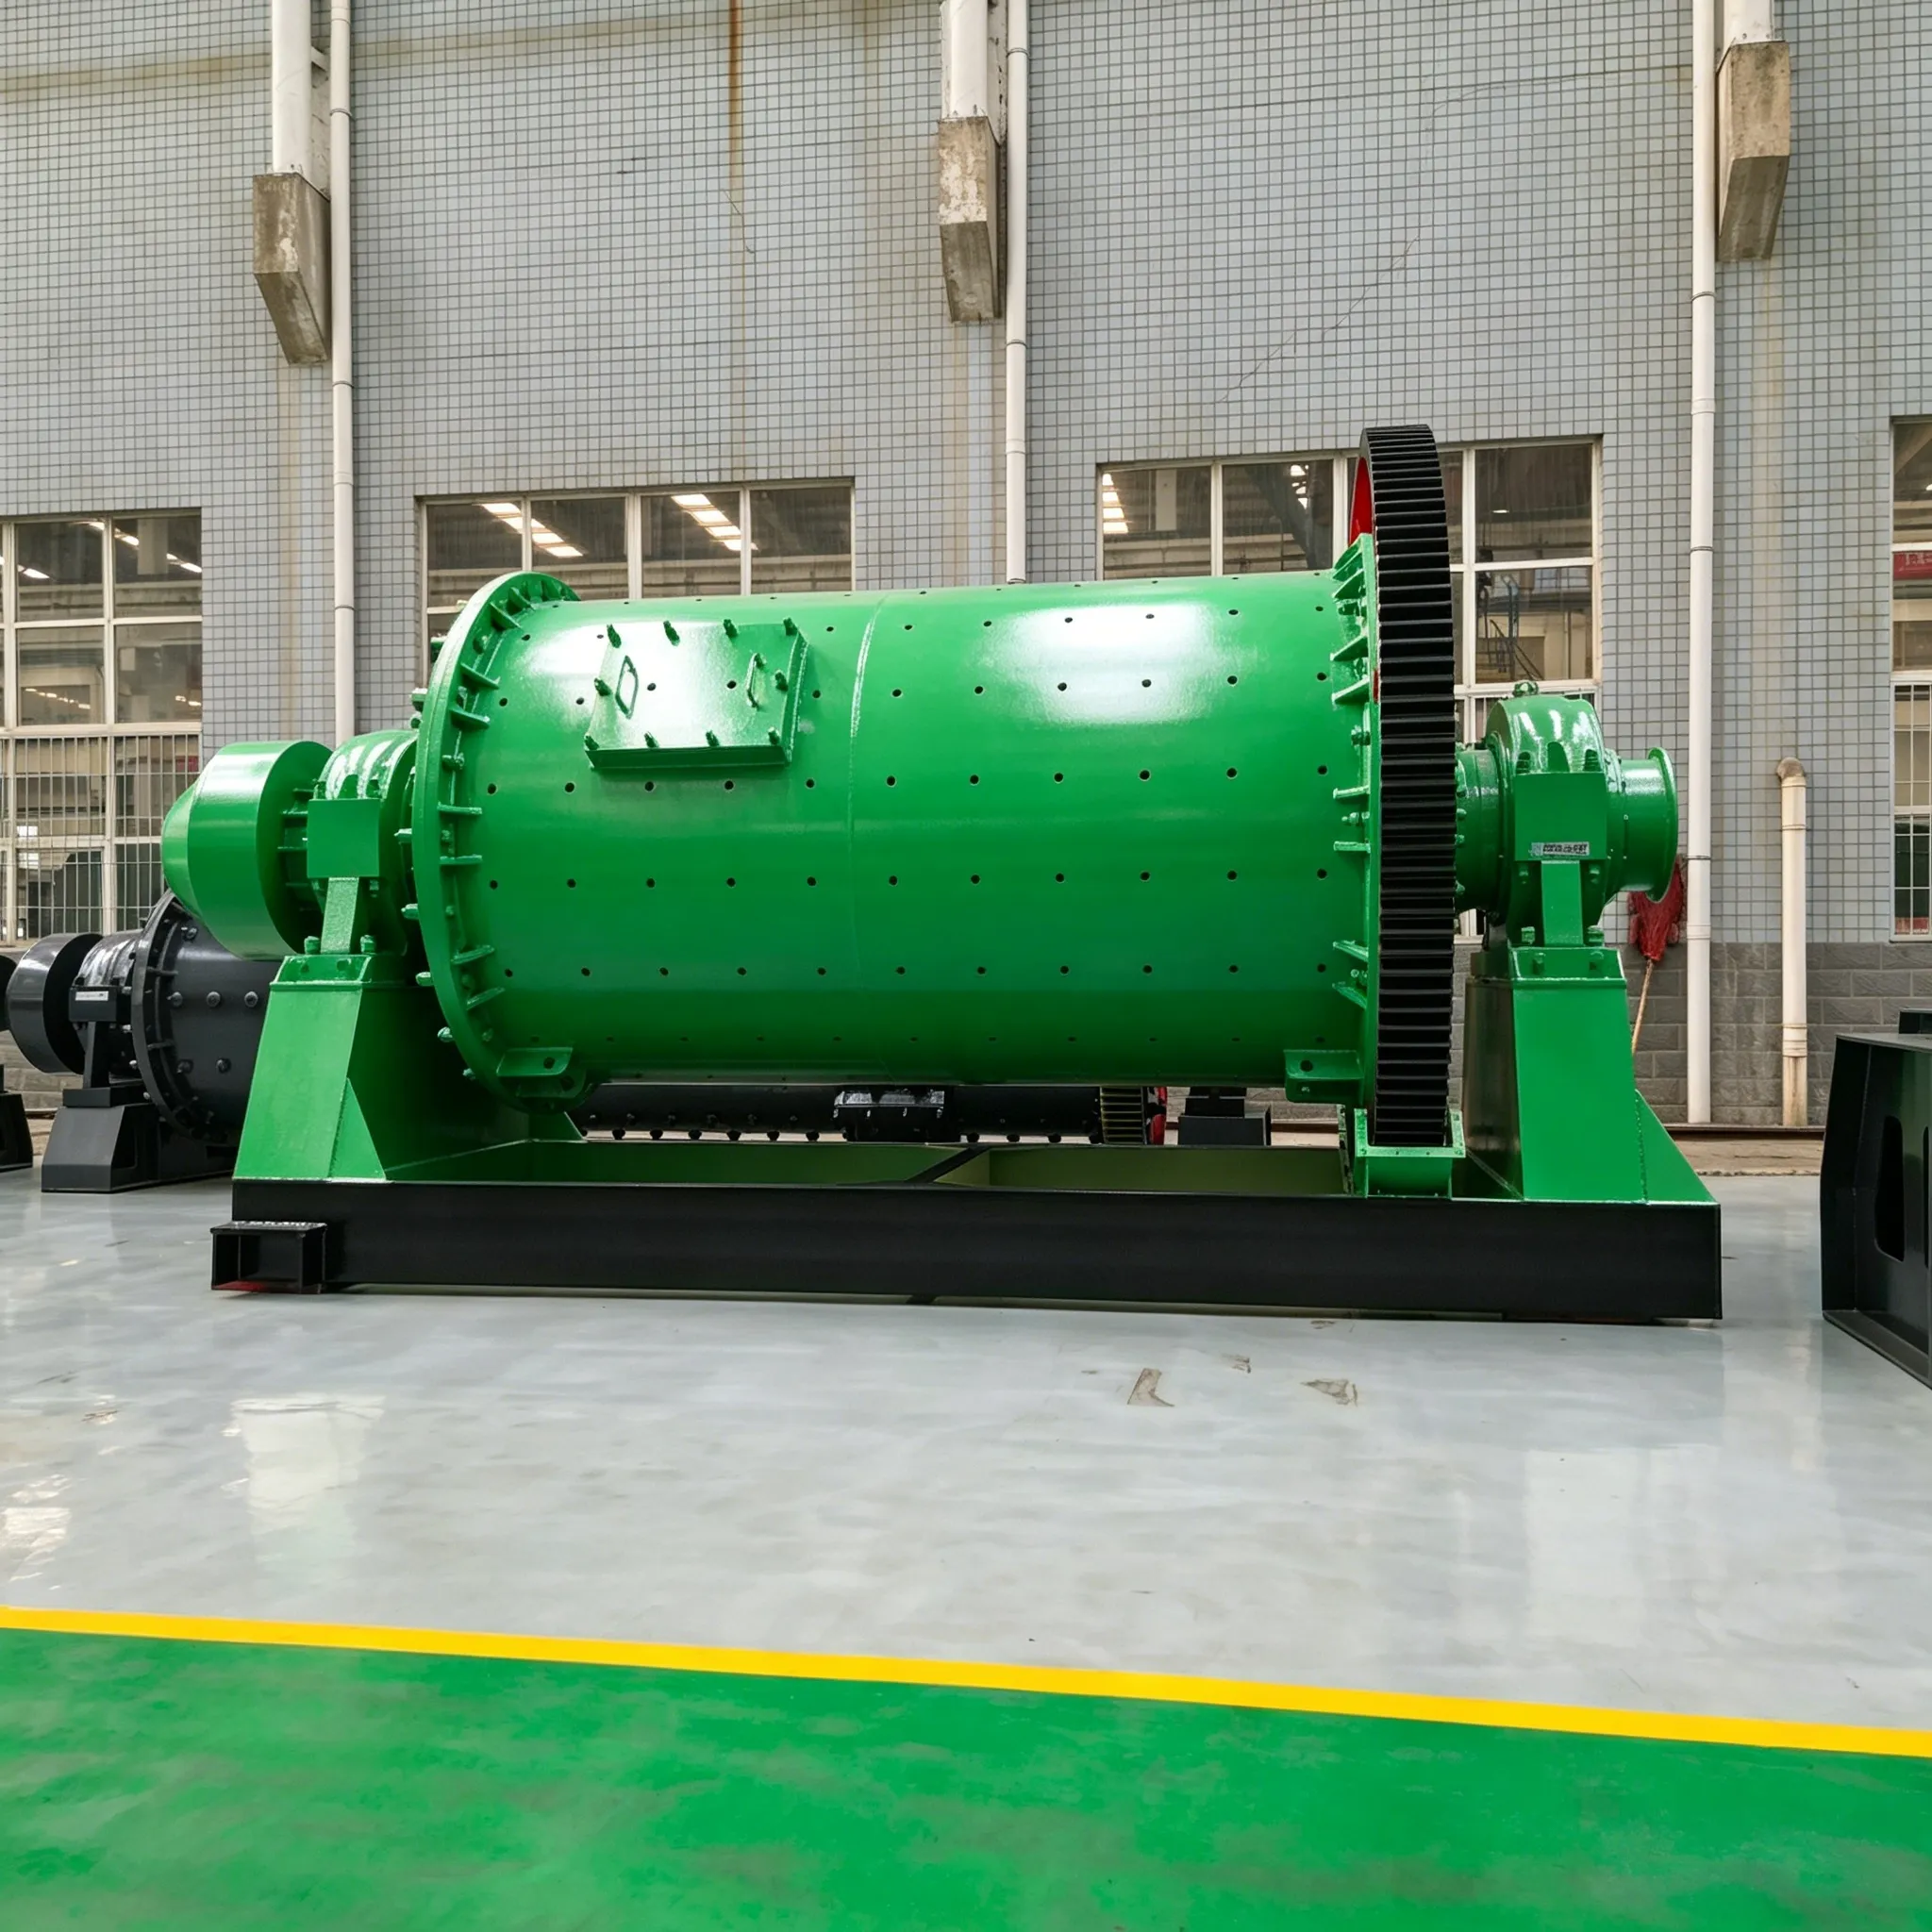
A newly designed concentrator inevitably requires the installation of grinding mills. In operating concentrators, process modifications, major overhauls, or equipment replacements may also necessitate the reinstallation of grinding mills.
Apart from the manufacturing precision of the grinding mill, the quality of installation is crucial to its normal operation. Poor installation quality often leads to rework and economic losses. Therefore, during the installation of grinding mills, strict adherence to design requirements and technical specifications is essential. The entire installation procedure must be inspected step by step, with detailed records kept, and systematic errors should be eliminated as much as possible.
The installation methods and procedures for various types of grinding mills are essentially the same, generally carried out in the following sequence.
9.6.1.1 Grinding Mill Foundation
The foundation of a grinding mill must not only bear the full weight of the mill but also withstand dynamic loads caused by impact, vibration, and other forces generated during operation. To ensure load-bearing capacity and stability, and to prevent settlement or cracking during mill operation, the foundation must be placed on solid ground, and the weight of the reinforced concrete must be 2.5 to 3 times that of the grinding mill. The foundation must not be connected to the walls or columns of the plant building; a distance of at least 1 m, and no less than 40–50 cm, should be maintained between them. If the distance is smaller, the gap should be filled with stone slabs to prevent building vibrations caused by mill operation.
Before installing the grinding mill, it is necessary to carefully check the relative positions and dimensions between the foundation and adjacent buildings, structures, and adjacent units, and verify that they conform to the design drawings. Various inspection methods are available, such as measuring from a reference point using surveying instruments or using the alignment wire method. Regardless of the method, the goal is to determine the relative positional relationships and key dimensions, such as the horizontal distance, parallelism, perpendicularity (angle), levelness, and relative height difference between the axes of the grinding mill, reducer gear, and electric motor, as well as the position and size of the预留 holes for anchor bolts, ensuring they meet design requirements and match the actual bolt hole sizes of the mill base. After completing these tasks and determining all positional dimensions, the installation can proceed.
Before installation, all machinery and equipment should be thoroughly inspected for completeness, defects, and compliance with installation and operational requirements, and they should be cleaned and lubricated.
9.6.1.2 Installation Sequence
The installation sequence is as follows:
(1) Base Frame Installation. The grinding mill, including the reducer and motor, generally has four base frames: the front and rear bearing pedestal base frames of the mill, the motor base frame, and the reducer base frame. During base frame installation, use a steel tape measure and a spirit level (level) to check the horizontal elevation and levelness of the base frames. If any unevenness is found, use steel adjusting wedges under the base frame to level it. All wedges should be 50–100 mm wide, and their length should be such that during installation, they extend beyond the centerline of the anchor bolt inside the base frame and protrude 10–50 mm externally. The wedge slope can be 1:10 to 1:20. After leveling, the wedges should be welded together to prevent movement.
(2) Main Bearing Installation of the Grinding Mill. After adjusting the two main bearing base frames and tightening the anchor bolts, re-inspect them. Once all data meet the technical requirements, proceed with the installation of the main bearings. The installation and inspection methods for the main bearing seats shall comply with the requirements of Table 9-13.
Table 9-13. Permissible deviations for mill installation
| Item No. | Project | Allowable deviation | unit | Testing method | |
| 1 | Longitudinal and lateral centerlines | 1.0 | mm | Hang the line, measure with a ruler | |
| 2 | Elevation | ±0.5 | mm | dumpy level | |
| 3 | The centerline of the two main bearing housings | ≤5000 | ±1.0 | mm | Measure with a ruler |
| 5000-10000 | ±1.5 | mm | Measure with a ruler | ||
| Over 10,000 | ±2.0 | mm | Measure with a ruler | ||
| 4 | Shaft alignment between the two main bearing housings | 1.0 | mm | Hang the line, measure with a micrometer | |
| 5 | Horizontal level of the main bearing housing | 0.1/1000 | One | Level meter | |
The main bearing and the surrounding area of the bearing base frame should be in uniform contact, with local gaps not exceeding 0.1 mm.
The assembly of the main bearing shell and the hollow shaft shall comply with the provisions of the equipment documents. In the absence of such provisions, the following requirements shall be met: the contact angle shall be 70° to 90°; the number of contact points within each 25 mm × 25 mm area shall not be less than 2 points; the total clearance on both sides of the bearing shall be 0.15% to 0.20% of the journal diameter.
(3) Installation of the Mill Shell, End Covers, and Girth Gear. Before the grinding mill is placed into the main bearings, the shell, end covers, and large girth gear shall be assembled together. Prior to assembling the shell and end covers, the shell shall be inspected. Its ovality shall not exceed 4/1000 of the shell diameter, and the allowable ovality error of the shell flange shall comply with design specifications. The surface finish and ovality of the hollow shaft journals shall also be checked. After meeting the requirements, the end cover spigot and the shell flange shall be coated with mixed red lead and linseed oil, and then aligned according to markings. After alignment, all dowel pins shall be inserted. When the positioning is acceptable, the bolts shall be tightened evenly. This completes the assembly of the shell and end covers. When the girth gear is split into two halves, it is generally installed after the rotating body of the mill has been placed onto the main bearings.
The installation of the shell and end covers onto the bearings shall meet the following requirements:
(4) Assembly of the Girth Gear shall meet the following requirements:

Figure 9-16 Checking the end face circular runout of the main bearing
1—Hollow shaft; 2—Main bearing; 3—Dial indicator
Table 9-14 End face circular runout of the main bearing (mm)
| The distance between the centerlines of the two main bearings | Simplified diameter | ||
| 900~1500 | 2100~2700 | ≥3200 | |
| The end face circular runout does not exceed | |||
| ≤5000 | 0.6 | 0.8 | 1.0 |
| 5000 to 10000 | 0.7 | 0.9 | 1.1 |
| >10000 | 0.8 | 1.0 | 1.2 |
(5) Installation of the Drive Unit.
Table 9-15 Gear backlash (mm)
| Center distance (mm) | Gear backlash (mm) |
|---|---|
| 580–800 | 0.67–1.25 |
| 800–1250 | 0.85–1.42 |
| 1250–2000 | 1.06–1.80 |
| 2000–3150 | 1.40–2.18 |
| 3150–5000 | 1.70–2.45 |
(6) Installation of Liners and Diaphragm Plates.


